Quick Start Guide
Last updated
Was this helpful?
Last updated
Was this helpful?
Migration-center has 3 main components: Database component, WebClient and Jobserver component.
Please see the System Architecture page for a more detailed explanation of migration-center's components and port connections.
This is just a quick overview of the installation process. For specific details please see System Requirements and Installation Guide.
The main migration-center components can be installed either on the same machine or on separate machines, by using the installers.
The Jobserver installer can be run on a windows machine, but to actually start the Jobserver you need Java 8 or 11 installed. The Linux Jobserver does not have an installer, it has scripts to install the service.
The WebClient installer can be run on a Windows machine as well. It will deliver a customized Tomcat that is installed as a windows service.
The general process of performing migrations with migration-center is done in several steps:
The Analyze phase involves configuring a Scanner to connect to a Source System, that will extract the metadata and save it as objects in the migration-center database, and export the content to a defined Filesystem location, which acts as a staging area.
The Organize phase involves assigning Scan Runs into Migration Sets, or migsets for short.
The next 3 phases, Transform, Validate and Correct, work together and involve creating Transformation Rules by which your Source Metadata is Transformed into Target Metadata. The metadata is assigned to Target Type definitions, which can be defined in advance. And based on those definitions the metadata is Validated. If the resulting target metadata is not the desired one, you can reset the objects and repeat the process by correcting or adding transformation rules.
The Import phase, is the last step, and involves creating an Importer, which will connect to the Target System, assigning a migset with Validated Objects to it and starting the import run. You can monitor the progress in the importer run history or directly in the migsets view.
All the migration phases can be done in parallel for different batches of documents that are migrated.
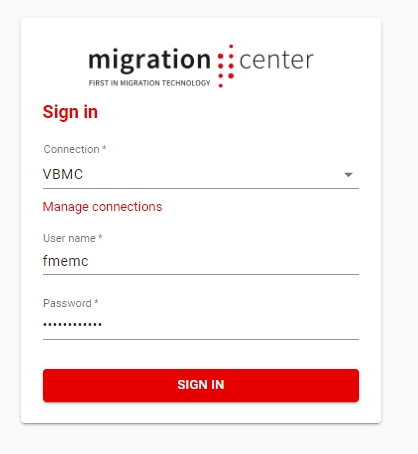
When you first access the link to the WebClient you will see a login window.
The default login user is fmemc and the default password is migration123.
If this is a fresh installation your Connection dropdown will be empty. You will need to configure a new connection to your Database.
This is done by going to the Manage Connections view and clicking Add Connection.
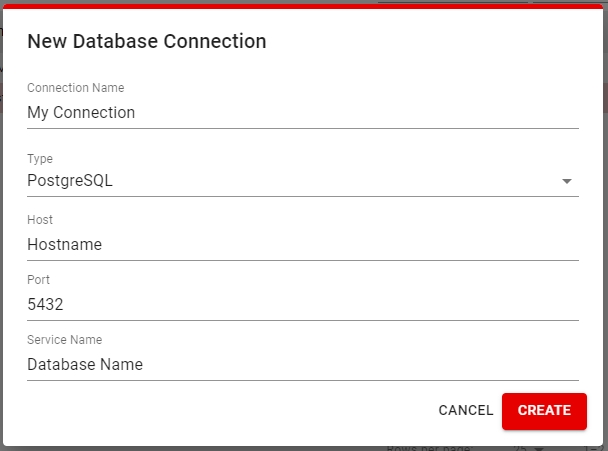
Here you will set a Connection Name and the Database Type, Host, Port and Service Name(database name) for the database you will be using. Click Create to create the connection and be able to use it when signing in.
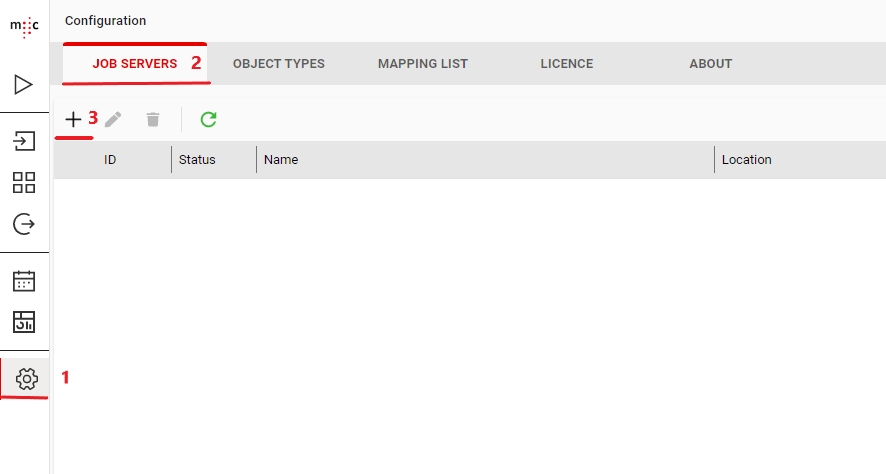
Before you are able to run a scanner you first need to define a Jobserver by going to the Job Servers tab of the Configuration page.
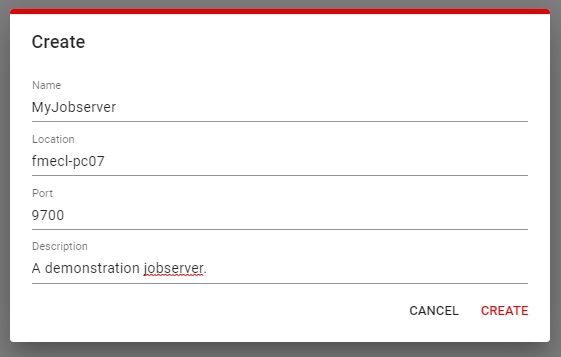
Click the Add Job Server button and enter the Name, Location (hostname) of the machine where the Jobserver component is installed, and the Port (default is 9700). An optional description can also be added.
Avoid using localhost or 127.0.0.1 for the Jobserver location. That will cause issues when using the scheduler feature.
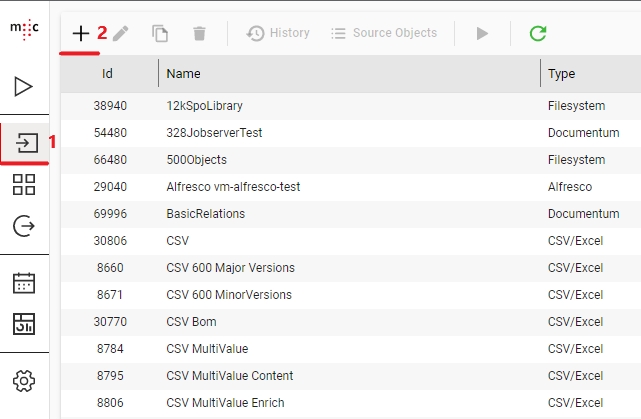
Open the Scanners page and click the Add Scanner button:
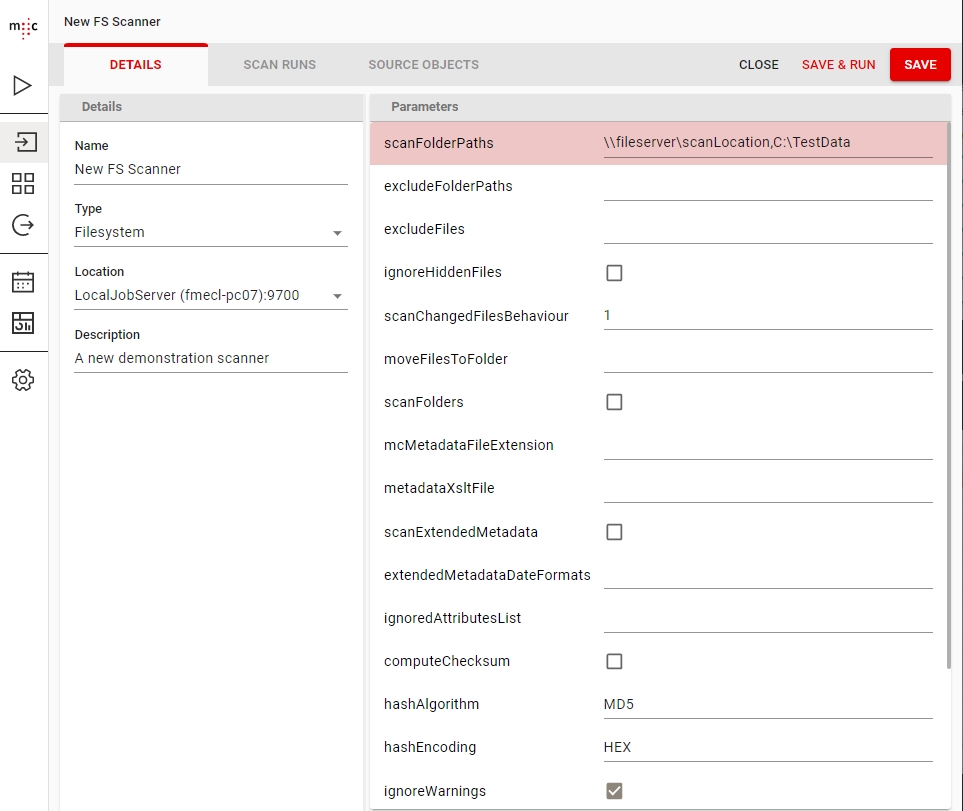
Fill in the Name of this scanner, select a type and select a Jobserver where you want this scan to run.
After you have filled at least the mandatory parameters of the scanner configuration you can save it by clicking on Save.
You can run it by clicking Save & Run in the toolbar, or by going back to the list of scanners and clicking on Start Scan Job in the Right Click context menu.
Clicking on History allows you to see a list of all Scan Runs performed by the this scanner configuration.
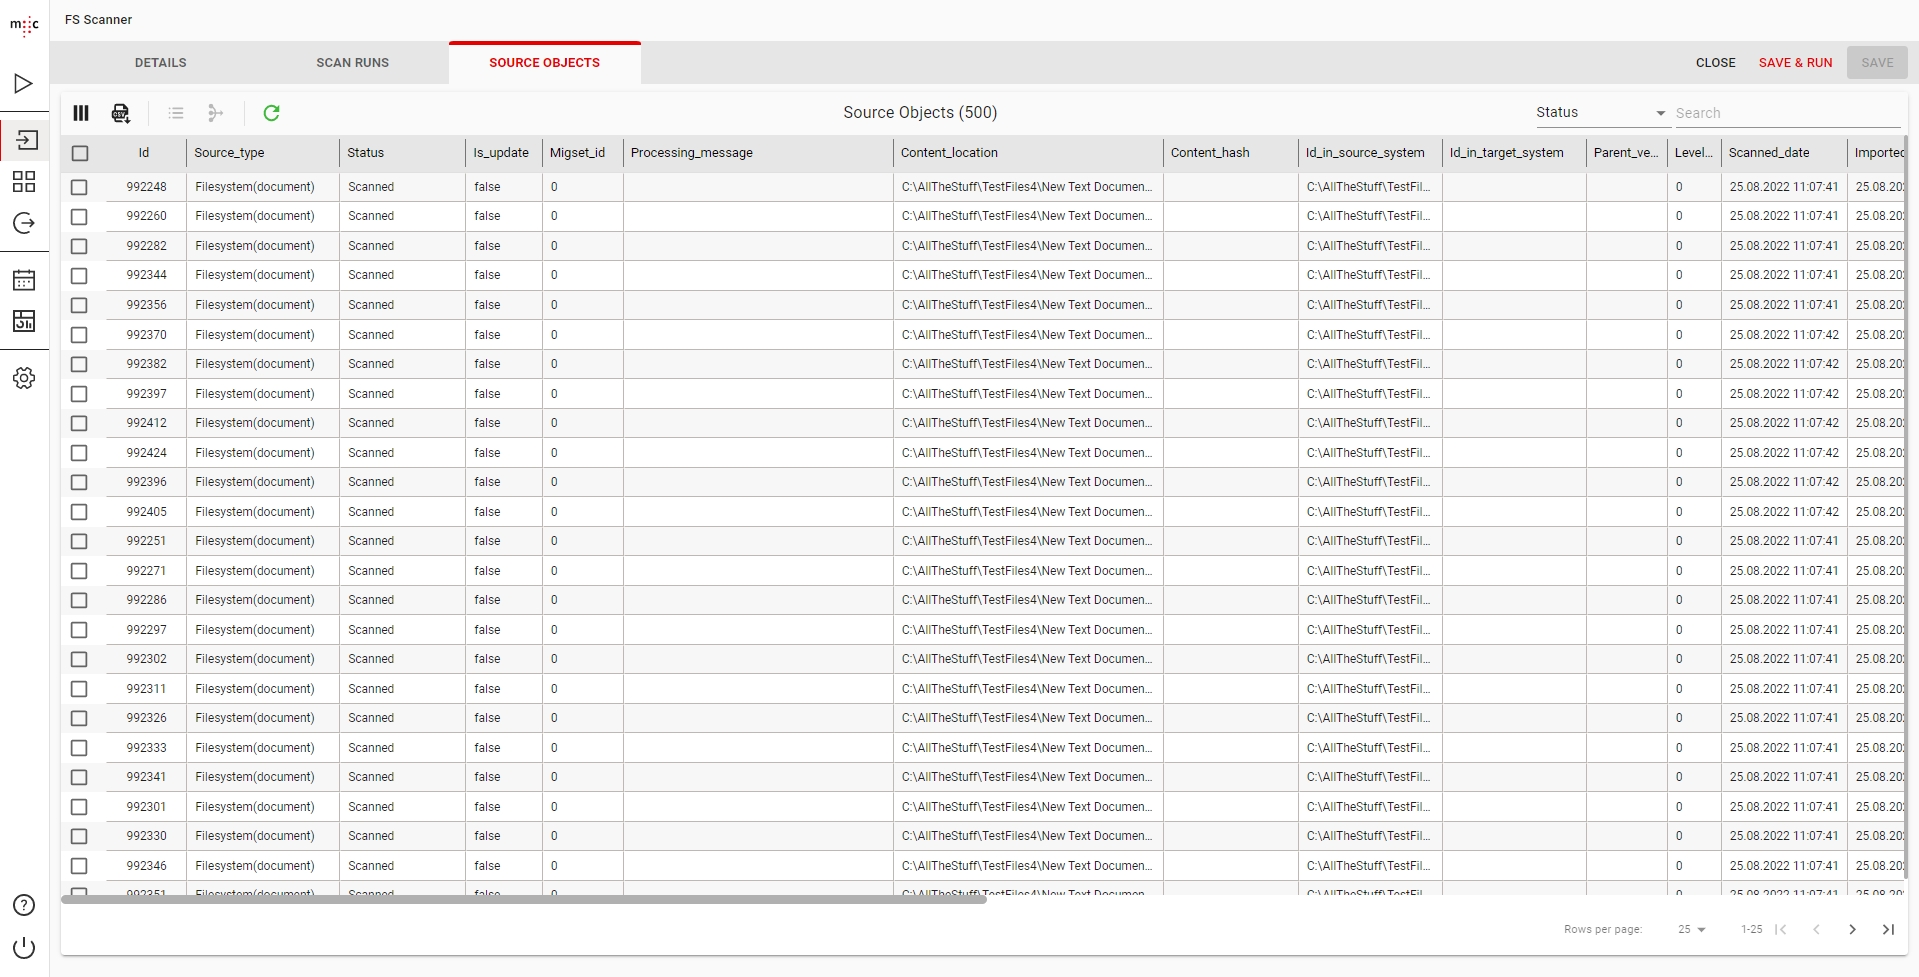
Clicking on Source Objects shows you the objects grid for this scanner or scan run.
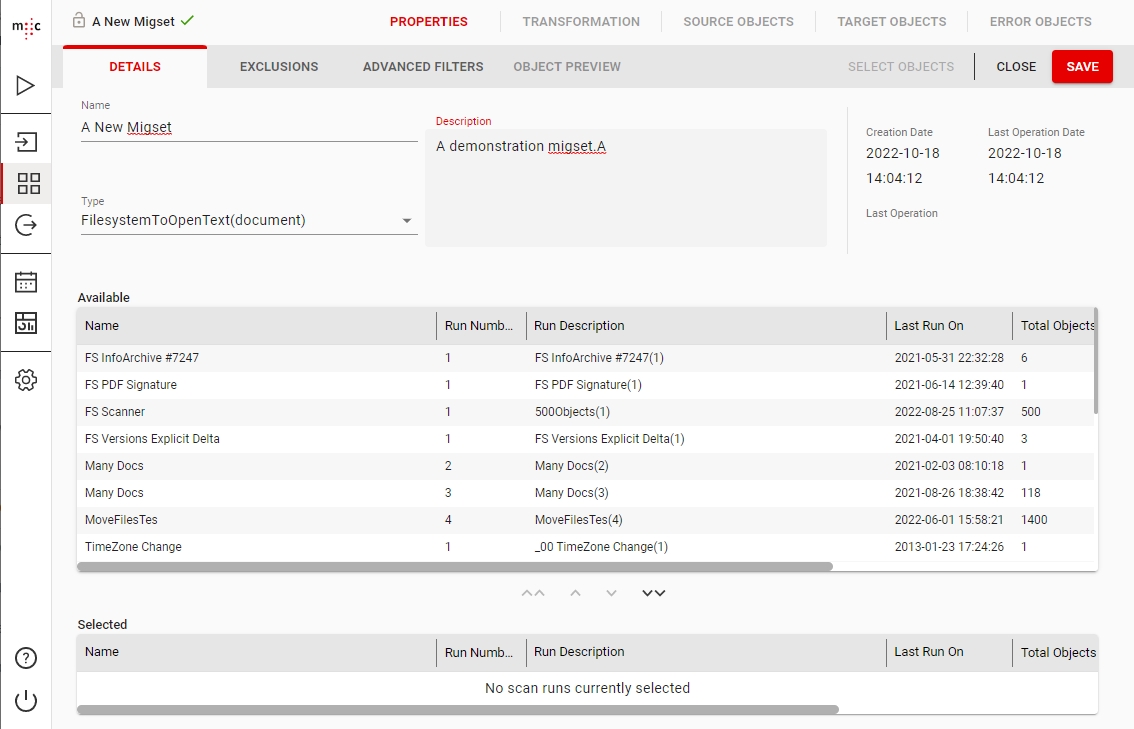
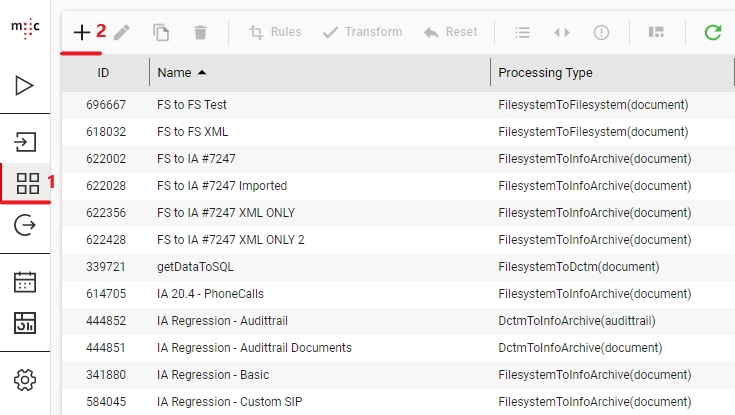
Open the Migration Sets page and click the Add MigSet button.
Enter a name for this migset and select the Migration Path from the Type dropdown.
In the same view, under Available you will see the scan runs corresponding to your chosen migration-path. Select which scan runs you want to include in this migset by double clicking them or by using the down arrow button.
To actually get the objects locked in this migset you need to click on the Select Objects button
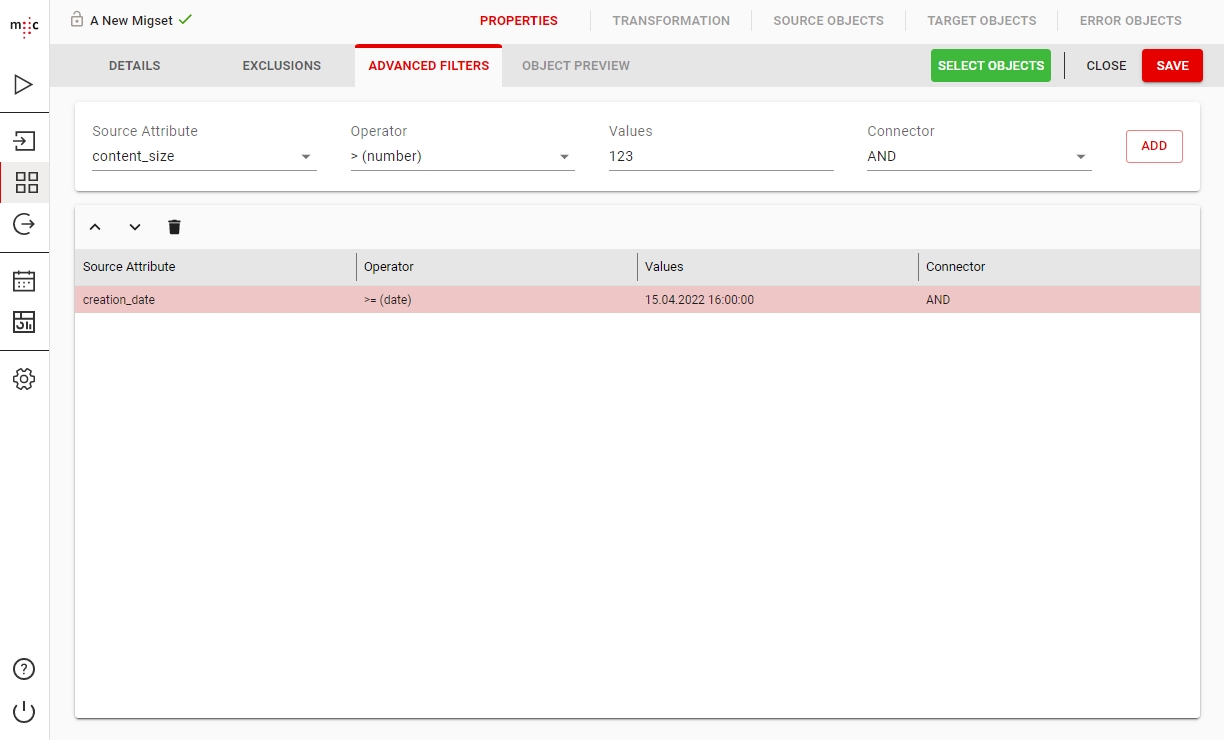
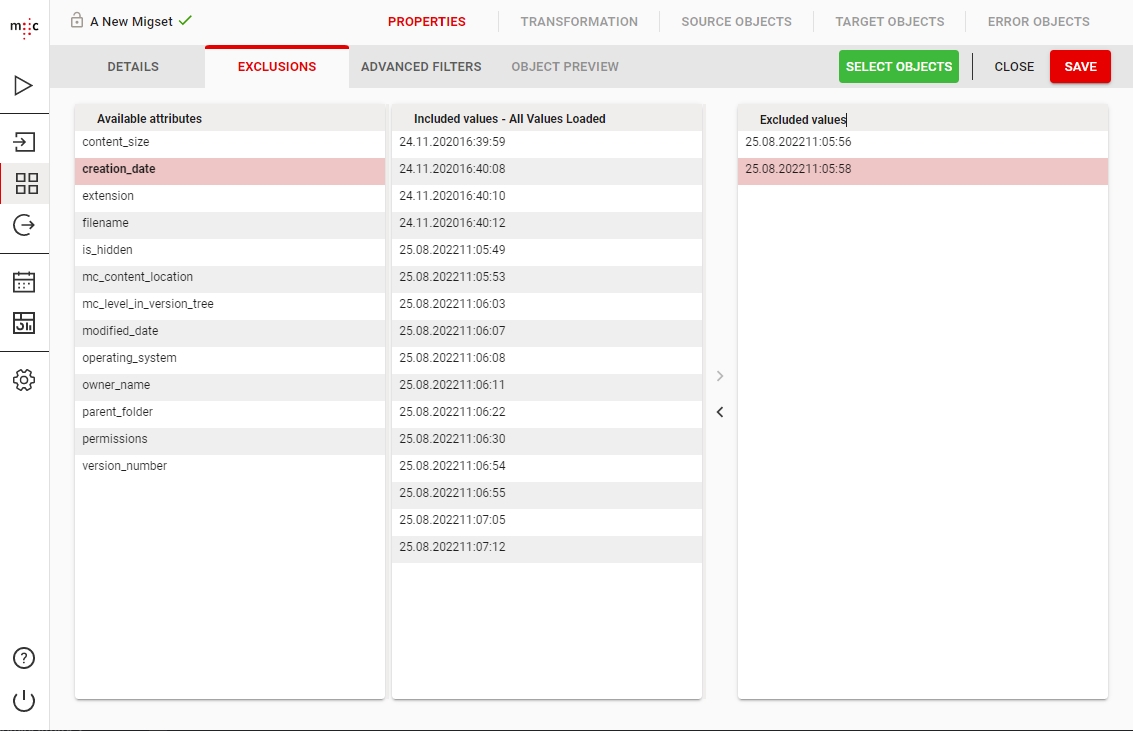
As an optional step before clicking on the Select Objects button, there are 2 filtering options:
Simple Filtering, where you can exclude objects based on their values:
Advanced Filtering, where you can create rules by which to select the objects:
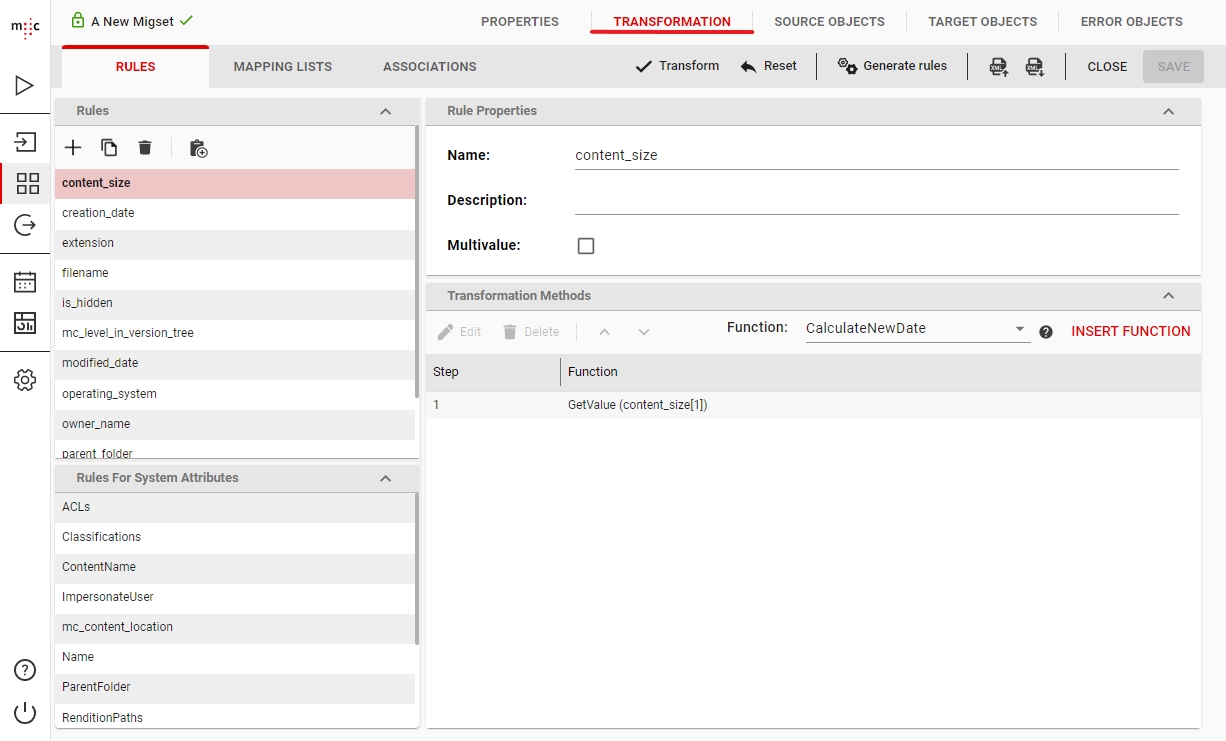
With the Migset you have just created selected, click on the Transformation from the toolbar.
The Rules section in the top left corner lists the Transformation Rules created so far in this migset. You can create a new one using the New button. In the middle there's the Rule Properties section where you can specify the rule Name and if it should return multi-value results.
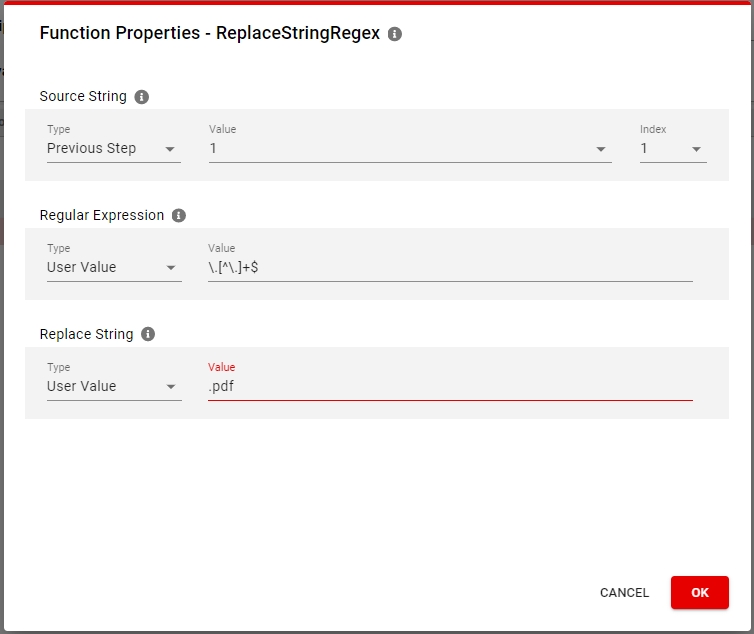
The Transformation methods section contains a dropdown of all the Functions that you can use inside your transformation rule. These functions take Source Attributes and static values to generate a new value as a Target Attribute. Multiple functions can be linked together by processing the result of a Previous Step:
As you can imagine this is the main strength of migration-center as it allows you to create very complex rules to ensure you get the required results in your Target System.
On the bottom left corner we have the Rules for system attributes. These function the same as the regular transformation rules, except they have a fixed name and therefore serve a specific purpose during the import. Please refer to the user guide of the Importer you are using for details on what each system rule does.
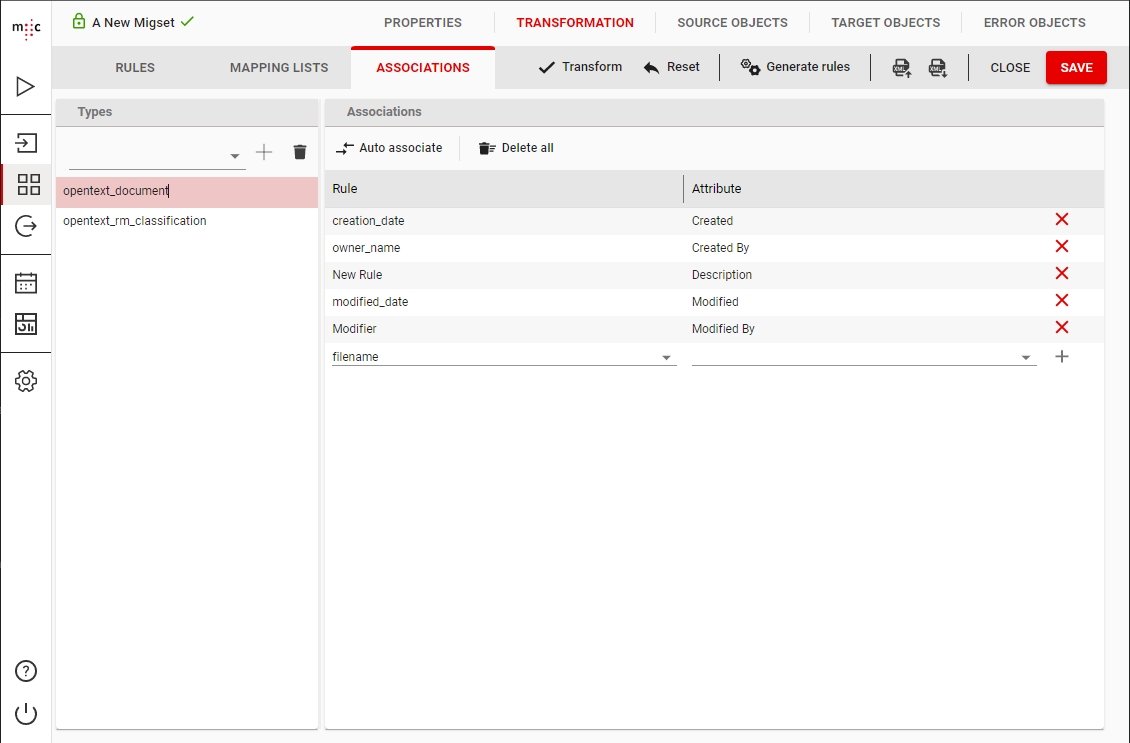
On the Associations tab of the Transformation view you can associate the previously defined Transformation rules to a Target Attribute of an object type.
The Types dropdown shows you a list of all Object Type Definitions in migration-center and you can select which ones are to be used in this migset. In the screenshot above we have selected opentext_document and opentext_rm_classification.
Clicking through the list of selected types will show, on the right side, the current associations between Rules and Target attributes.
The default system rule for specifying what Object Type to use is normally called target_type but differ in certain connectors (i.e. r_object_type in Documentum).
Rules that were not associated to any target attribute will NOT be migrated during the import
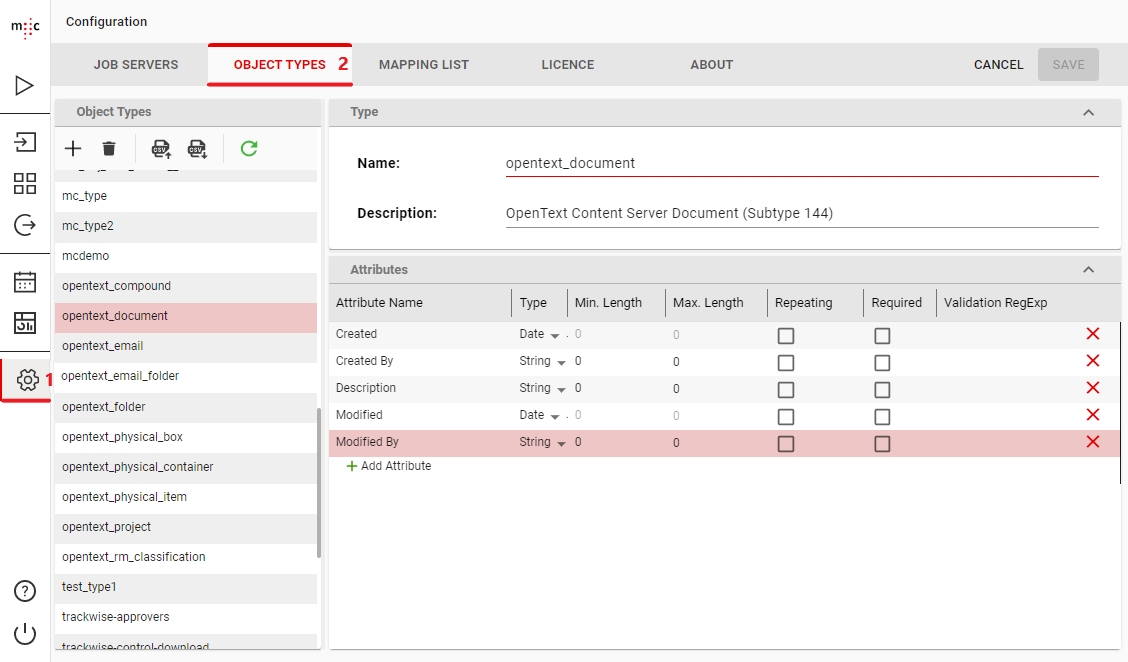
To mange the available object types in migration-center go to Configure -> Object Types
This will open Object Types view where you can create new Types and either manually adding each of the type's attributes or importing them from a CSV file. More details are in the Client User Guide.
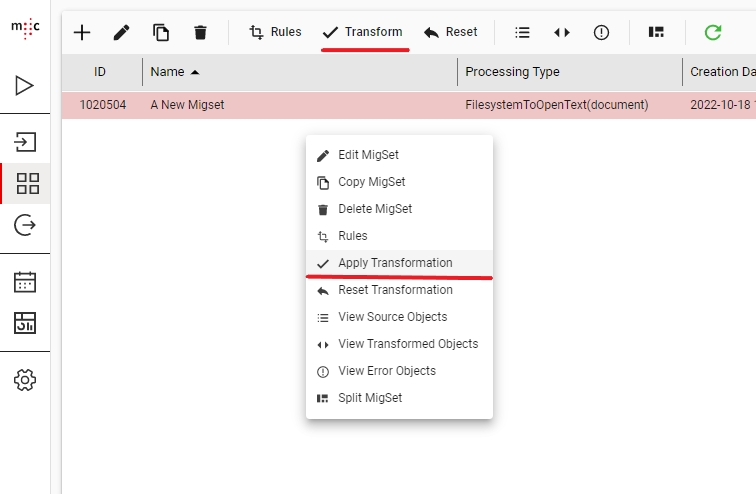
After you have finished writing the necessary transformation rules you can save the migset, and trigger Transformation on the migset. This will also apply Validation.
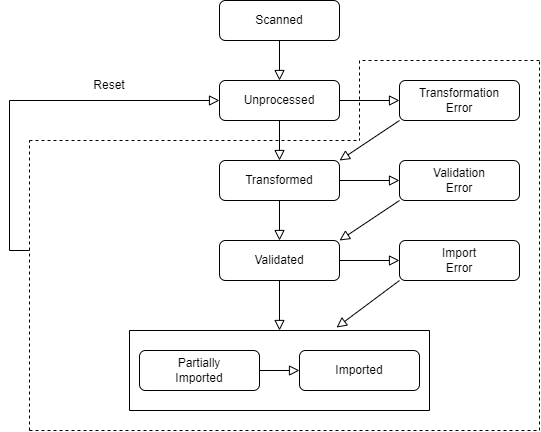
Transformation will apply the rules in the migset on each object individually and will generate the target objects. The objects will move to the Transformed state.
Validation will compare the generated values against the object type definition restrictions to ensure the values fit. If successful the objects will move to the Validated state.
The source metadata remains unchanged during the entire migration process and can be viewed in the Source Objects view
After doing the transformation, the Target Objects can be viewed in the Transformed Objects view.
If any issue occurred during transformation or validation, the objects will move to the Error state and can be checked in the Error Objects view.
Only objects that reached the Validated State will be processed by the importer. This includes objects which were validated and then marked as error during import.
Here is a diagram with all the states the Objects in migration-center can go through:
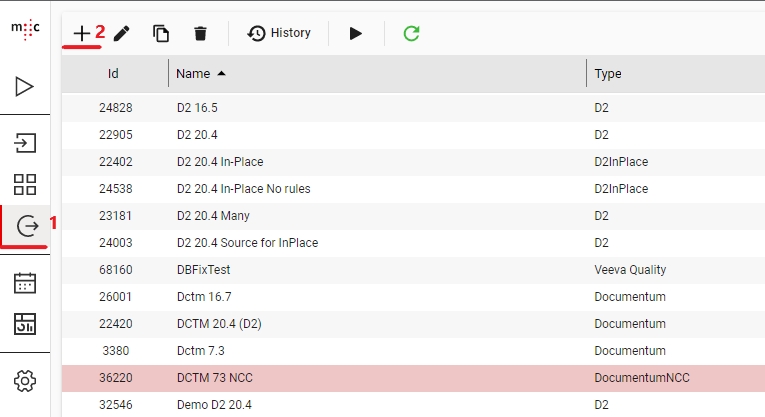
Open the Importers page and click the Add Importer button:
The Importers section is very similar to the Scanners one so we will only cover the differences.
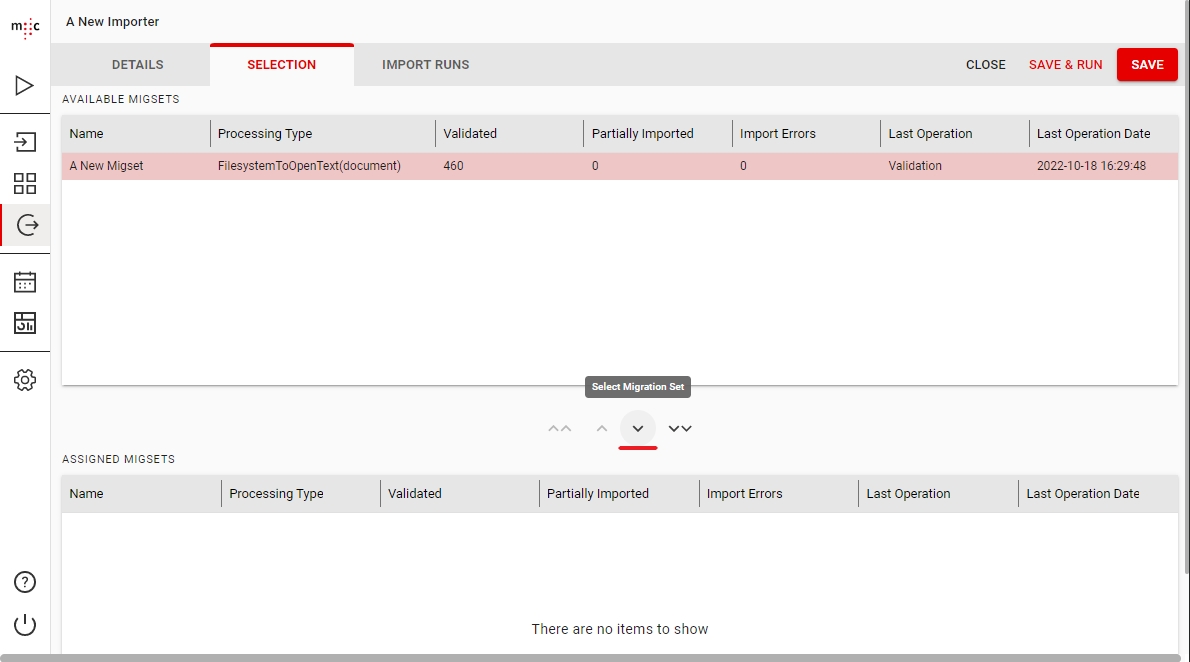
After setting all necessary parameters for your import to function correctly you must go to the Selection tab which will allow you to select one or more migsets for import. After that you can save the importer and run it.
You can monitor the status of the import either in the the Jobs view, in the importer History or in the Migsets view. Each view will show the progress of the migration in varying levels of detail, with the migsets one showing the most details of the objects being imported.
When the import has finished you can see the status changed to Finished and all the objects marked as Imported. If any errors or warnings occurred you can view them either in the Error Objects view of the migset or by opening the import run log from the history of the importer.
You can automate the migration process from Scan to Import by using the Scheduler feature. This is very useful in setting up a continuous migration of active systems where the users are still modifying and creating documents.
How it works: You create a scheduled job and select existing valid scanner, migset and importer configurations. If the Scheduler is set to active and depending on what interval settings are set, the scheduler will automatically perform the following actions: - Start the scanner - Create a copy of your migset and assign the scanned objects to it - Run Transformation and Validation - Assign the migset to the importer - Start the importer - (optional) send an email report if configured
The types of the scanner, migset and importer selected in a scheduler must belong to the same migration path.
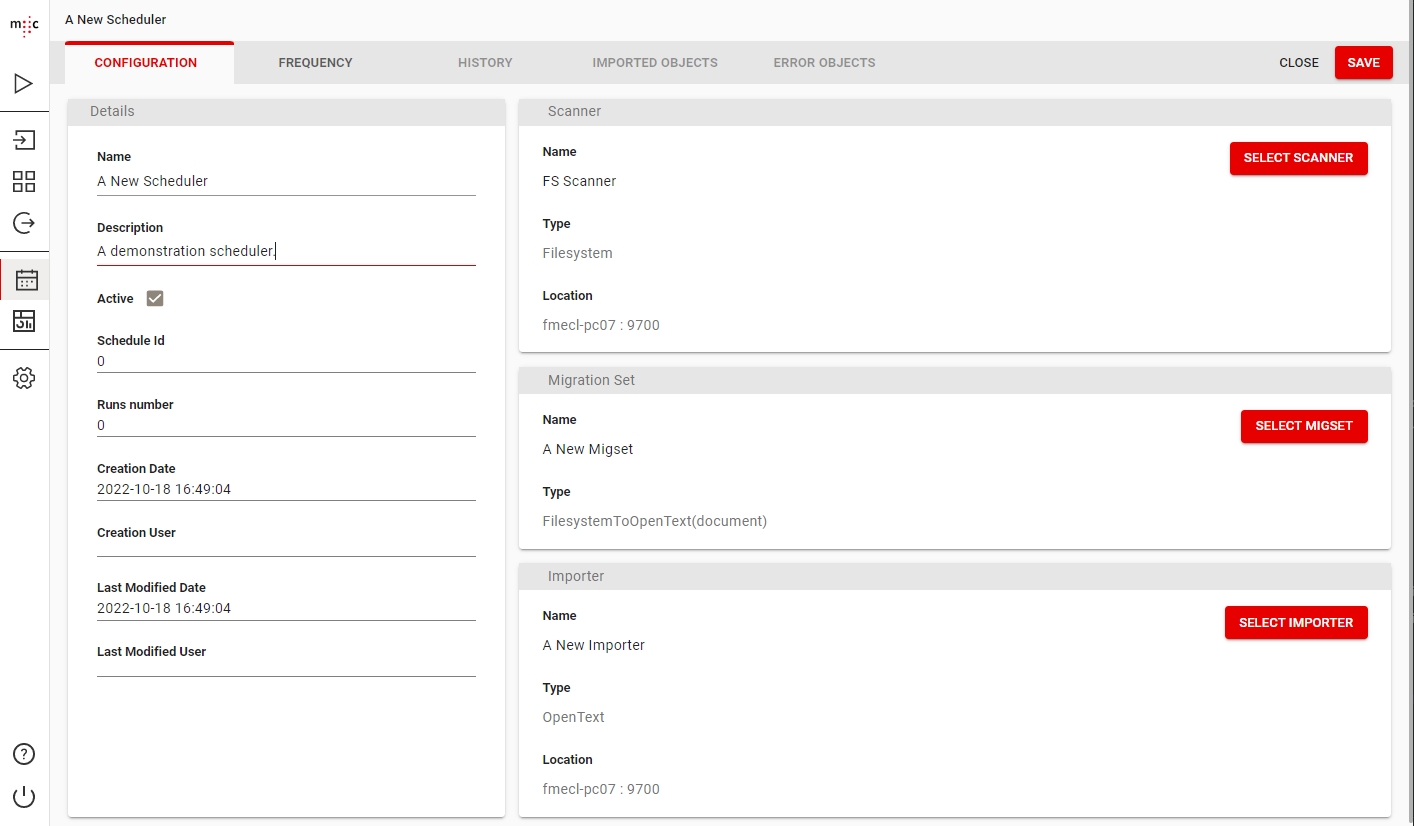
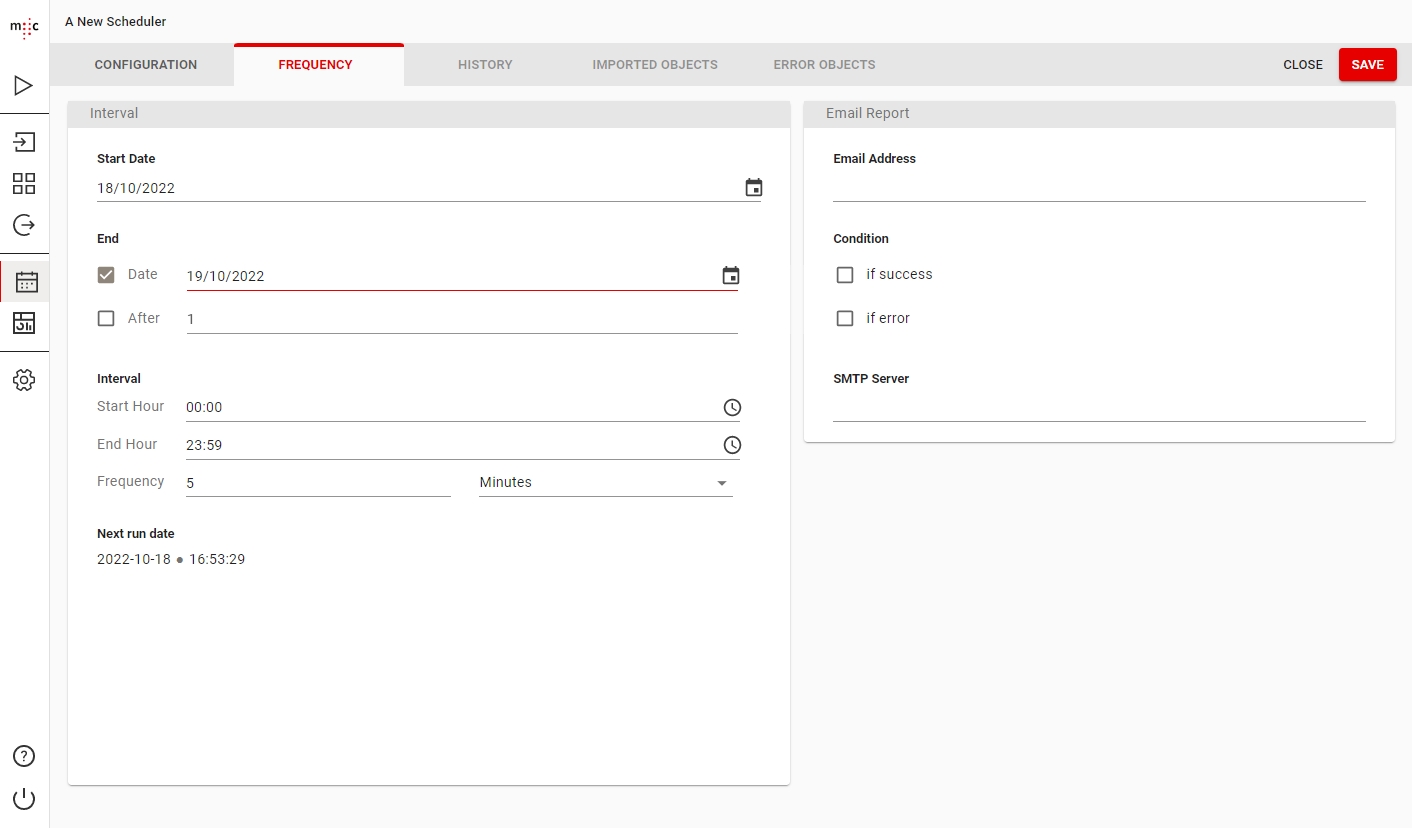
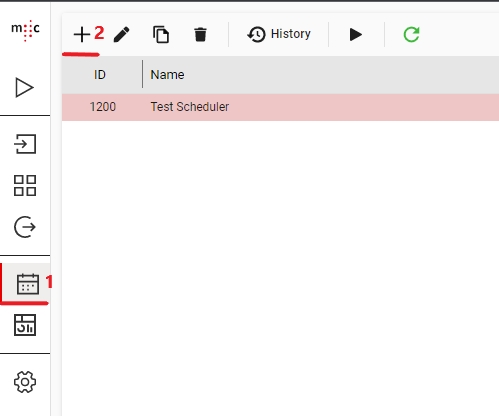
Create a new Scheduler and enter the Name and Description.
Here, you can also select your Scanner, Migset and Importer.
Next, on the Frequency tab, you have all the options to configure when your scheduled job will trigger and when it will stop triggering. Here you can also configure the email reporting feature.
You can click Save to save the Scheduler and it will start at the scheduled time.
If you open the History tab you can see the list of all runs of the scheduler along with some information about the status of each run.
The mapping lists are a simple and very powerful feature of migration-center. They can be used for a wide variety of scenarios.
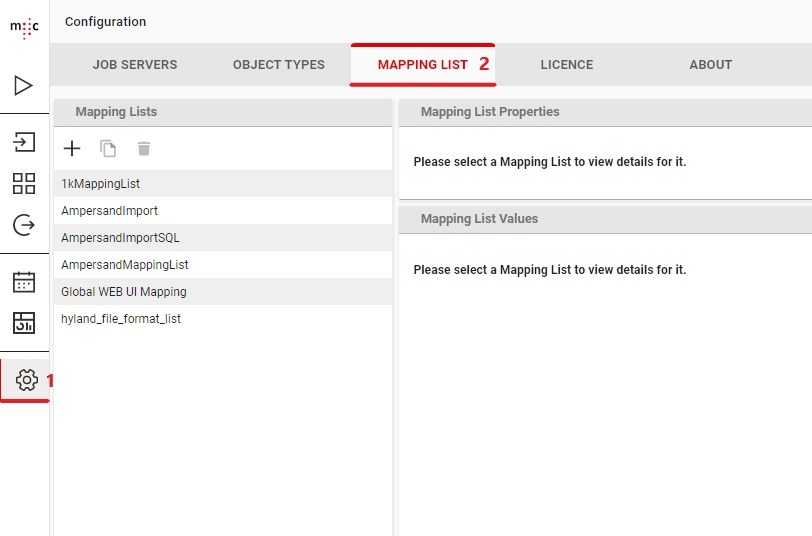
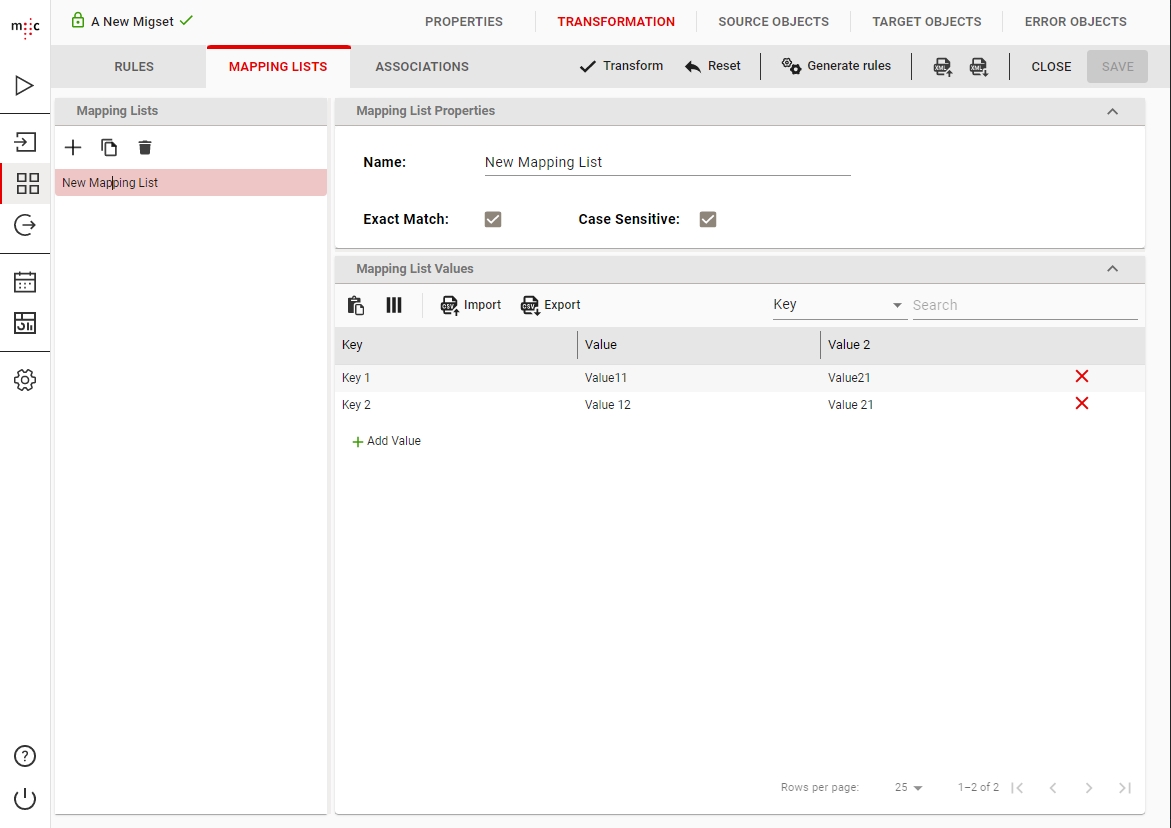
A mapping list is just a collection of key - value pairs. A mapping list can also contain multiple values for one key. You can create one globally using the Configure -> Mapping List menu. This will make the mapping list available for use in any migset.
Or you can also create it directly in a migset for use only in that migset.
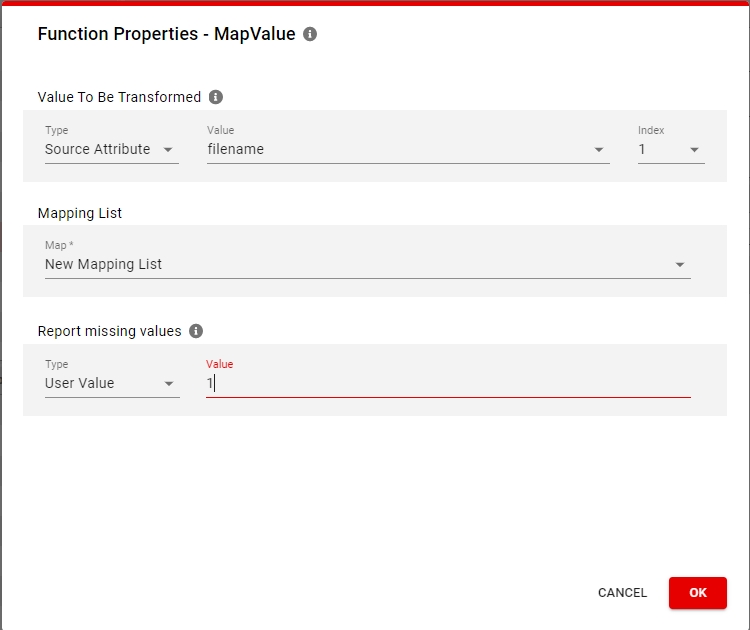
To use your created mapping list you must use the mapValue() function inside a migset's transformation rules.
The value to be transformed is matched with the values in the Key column of the mapping list. If a value is found then the function returns the equivalent value from the Value column. If the value cannot be matched or the source value is null, the function will trigger a Transformation error on the object or return an empty value (depending if Report missing values is set to 1 or 0).

